Wednesday, March 30, 2016

Recycled Egg Shells For Calcium Rich Soil

Why Recycle Egg Shells?

How do egg shells help nourish plants and soil?


Recycled egg shells? Recycled styrofoam egg cartons? Are gardeners stingy and budget sensitive or just plain crazy? While they may be mindful of budgets, they are crazy about calcium rich soil! They are very skillful in utilizing natural resources for soil amendments.

As a Master Gardener and someone who is mindful of not leaving a foot print on the earth, I cringed when a well meaning friend handed me a bunch of styrofoam egg cartons she had saved. Oh, the thoughts racing through my head! Why would anybody use styrofoam in this day and age? Does't she know what that type of carton does to our landfills, our earth? I don't want to be seeing styrofoam popping up from the earth in year to come...yes, my thoughts went on and on. It was a year or so later (yes, I stuffed them in a back closet and left them for that long refusing to use "styrofoam.") before I made the connection that these NOT SO ENVIRONMENTALLY friendly cartons would actually make great trays for holding egg shell planters! They are water proof so they protect surfaces and hold extra water as needed. And of course, the important thing-they hold the egg shell perfectly. I now take care of those cartons I was so mortified with, saving them after each use for years ahead. None of them have a cost to me and it is a great way to recycle and reuse. Compare that to the cost of buying seedling trays...

So why recycle egg shells? How do they nourish the soil? Egg shells are rich in calcium! Calcium is a very important nutrient in both plant and soil, with only nitrogen and potassium required in larger amounts by plants. It is brought into the plant by water the plant takes up. While we typically tend to see calcium supplemented with the use of lime, egg shells are also a great choice! And, a staple in most homes. Since I raise laying hens for my own, fresh, organic, free range eggs, I appreciate being able to use my own natural resources. 

Role of calcium in plants and soil
  • Plays critical role in the metabolic process of other nutrients uptake and carbohydrate removal.
  • Neutralizes cell acids.
  • Strengthens cell wall structure.
  • Improves soil structure in heavy clay soils.
  • Binds organic matter to clay.
  • Decreases sodium content in soil.
  • Protects plants against heat stress, diseases, fungi, and bacteria.
  • Affects fruit quality
Every plant needs calcium to grow, without adequate amounts, plants experience a variety of problems. 

Signs of calcium deficiency
  • Brown roots, stunted growth.
  • Bulb and fruit abnormalities/damage. 
  • Necrosis at tips in young leaves and deformed leaves.
  • Chlorosis. 
Using a calcium spray can yield a higher crop of tomatoes, squash, and make a difference between a sweet/tart to bitter apple. You can make your own calcium spray by bringing 20 eggs in 1 gallon of water in a covered pan to a rolling boil. Once boiling, remove from heat and let cool for 24 hrs. Strain water of shell pieces and store in air tight container in a cool, dark place. Use the spray lightly on your calcium deficient plants,or use lightly to fertilize. 

It is important to note that acidic soil is often associated with calcium, however, this is not the case. Whenever you add a nutrient to the soil, you change the balance. You may need to adjust your nitrogen and potassium levels. A good soil has a pH 7.


I love using the shells to start my seedlings. When the seedling is ready to be planted into the ground, I gently break the shell before planting it directly into the soil to help the roots spread easier. By using the shells as a planter, I double the recycling power of them as they also add calcium to the soil. 

You do not have to break the shells up into tiny pieces or grind into powder if using in the soil, they will eventually break down on their own, it just helps them to decompose quicker if you break up the shells. And don't forget your compost! Toss your unused shells into the compost pile!

Share your gardening recycling and soil amendments with us! Nourish our ideas as you nourish your garden! 

Wednesday, March 16, 2016

St. Patrick's Day Shake

St. Patrick's Day Shake


Healthy twist on a Shamrock Shake!


Once again I am delighted to share a recipe that was shared with me by my daughter, Chelsea!
In my previous post, I explained that Chel had sent me a note with some recipes. Well, this is the other recipe on that adorable little postcard note. And it came just in time to experiment with different alternative recipe twists. 

The alternative recipe experiment was sparked by Chel asking for an alternative to the sweetened condensed milk. There are many people who are not able to consume dairy so I hope the recipe below is helpful to those who are lactose intolerant or are just trying to reduce dairy intake for personal reasons. I also hope it inspires others to experiment and create own recipes!

I am excited to celebrate St. Patty's Day starting with a morning shake!

The original recipe:

    *1 Can condensed milk
    *1 Avocado, peeled and seed removed
    * 2.5 or 3 tablespoons pure raw honey
    *1 cup ice
    * 1 tablespoon pure vanilla extract
    * 1 drop Young Living Peppermint Oil 

Recipe by Young Living


My favored alternative recipe:

    *1 cup sweetened almond milk
    * 2 tablespoons tapioca flour mixed with 1/4 cup almond milk 
    *1 avocado, peeled, seed removed
    * 3 tablespoons raw honey
    * 1 tablespoon pure vanilla extract
    * 2-3 drops of essential peppermint oil (I used Young Living brand as I prefer the way the process their oils)

Mix the tapioca mixture in with the cup of almond milk, add other ingredients and blend until desired. 

I did not use ice because the milk was cold and thin, unlike shelved canned condensed milk. I added the tapioca flour mixed with almond milk to thicken the shake. I experimented with arrowroot flour but it was a bit on the slimy side. Also, tapioca is a bit sweeter than arrowroot. I also found that just one drop of the peppermint was not strong enough. If you prefer things on the sweeter side, I suggest you add a just a pinch of stevia. I prefer not too sweet.


I love how the tapioca flour thickens this! As you can see from the picture, it is so thick the straw stands straight up! You can experiment with how thick you prefer by reducing amount of tapioca flour or just adding ice. Try using different nut milks or rice milk for different flavor effects. I bet cashew milk would be delicious! 

Share your favorite twist on this recipe with us! Post pictures of  you enjoying your St. Patty's Day shake with us! 

Wednesday, March 9, 2016

Spring Sugar Scrub

Sugar Scrubs

Lemon Mint Sugar Scrub


Most of you who have known me for awhile know that my passion for sugar scrubs is not new. Long before I started blogging or posting my creations on Facebook I've dabbled in making my own natural products. Perhaps I can spend some time gathering things I've done over the years and formidably blog them here. That would be a project in it's self...

Last week I received a little note in the mail from my daughter, Chelsea, sharing a recipe for a sugar scrub. Chelsea is very passionate about essentials oils and from time to time shares from her developing business things I might like. She is a avid lover of https://www.youngliving.com/en_US/products/essential-oils?gclid=Cj0KEQiAsP-2BRCFl4Lb2NTJttEBEiQAmj2tbTyHvplocV88J-SQgVT89kJ4rH88OdPmM0frj3Qiko8aApfT8P8HAQ 

I thought I would whip up a batch to share and surprise a yoga student with a special treat as well thank a woman, Nancy, who has generously shared her studio space with me so that I can grow my yoga classes and she can grow her studio. 

Here is the fun I had this afternoon!


The recipe for Lemon Mint Sugar Scrub is:  (I do NOT own copy right to this recipe, it has been shared with me, and I share with you-for your personal use only)

*1 1/4 cup sugar 
* 1/2 cup coconut oil
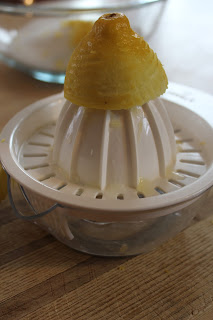
* 1 TBSP lemon juice
* Lemon zest from half of a lemon
* 5 drops each of essential oil of lemon and peppermint.

Mix ingredients together and jar as desired. (fills 3 4oz jars)

~Benefits from this recipe include moisturizing effects from coconut oil and exfoliating experience from the sugar& lemon.  

Special thanks to my daughter, Chelsea, for her sharing. 

I am very excited to share these treats with two special people!

Feel free to share your creations and how you treat it to others.


For The Love of Sprouting & Chickens!

Sprouting Grains for Chickens

Nourishing our chickens over the winter


Grains! Glorious sprouted grains. We enjoy sprouting for our own health benefits. We care for ourselves in organic, nutritious ways. But what about our chickens? How do we provide fresh nourishment  during the winter months to our free rangers? 

One of they ways we can provide our beloved chickens with entertainment and nutrition is by sprouting grains for them! A fresh block of sprouted grains on the white winter landscape will delight and feed our feathered egg laying friends. Take their health a step above the prepared pellets and increase the nutritional value of eggs-the eggs you eat and share with your family, friends, and local farmer's markets. 

I started experimenting with leftover grains I had in my pantry; millet and lentils. I have since been sprouting Red Clover and Oats. 

Millet & Lentils
First soaking


Day 3-sprouted lentils. Just about ready. I went another day before feeding them to my chickens. 


Without reinventing the wheel, I am sharing a couple of links that will provide for more detailed information regarding both sprouting grains in general and for chickens. Please take some time to read these great sites!


Share the ways you love your grains and chickens with us!